Manage subscription levels and their courses
With Paid Membership Pro integration with LearnPress, you can create membership plans for your students. Following that, you can let them buy Membership and paying monthly for groups of course instead paying for every course. You can create private course for Membership groups. You also can offer course subscriptions or members-only course discounts.
Allow to buy courses individually or only via subscriptions
Paid Membership Pro makes your pricing methods a lot more flexible. You can let your students pay per course, or pay by month (or a given period of time of your choice) or both, with a different recurring fees.
USAGE
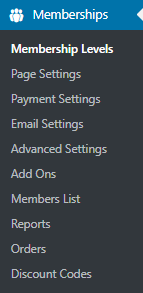
– ‘Memberships’ feature is added to Dashboard after add-on activation
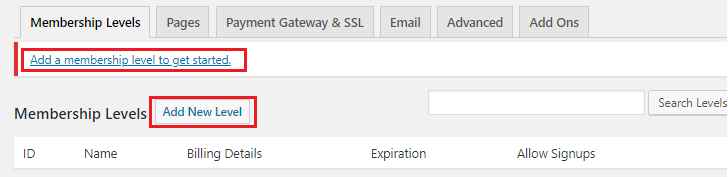
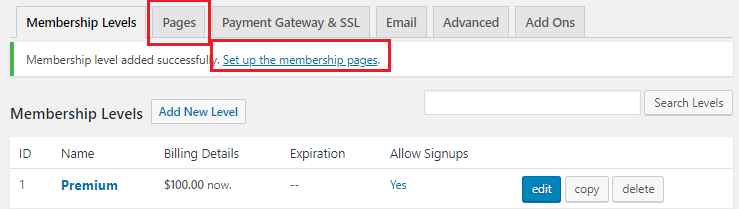
– Visit ‘Memberships > Membership Levels’. With first used customer, there is a notice to guide setup steps.-
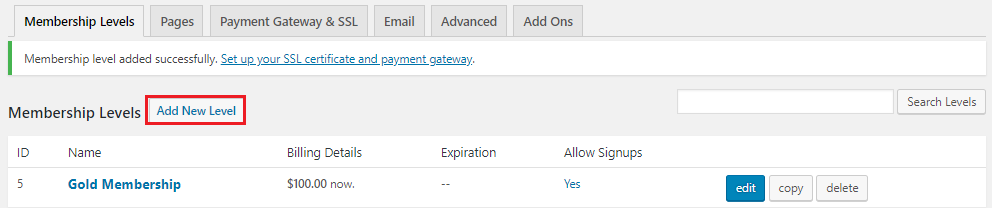
– Click ‘Add New Level’/’Add a membership level to get started’ notice to create new level or choose any existed level that you want to modify.
– Fill in the Name (For example, “Free”), Description or Confirmation message

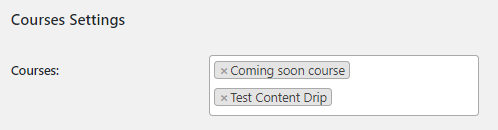
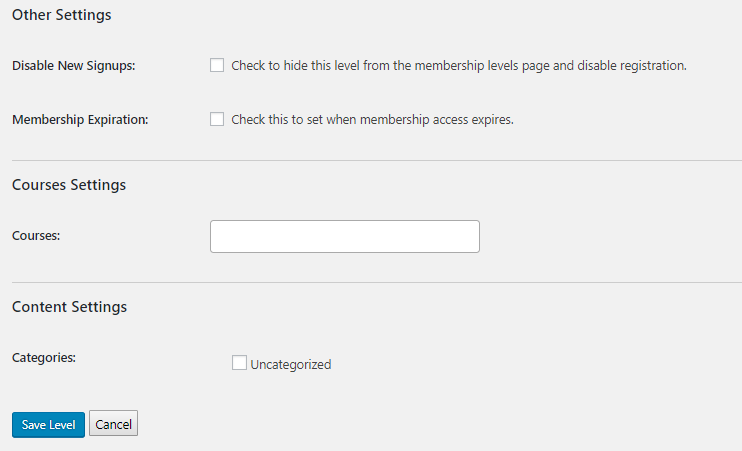
– Scroll down to ‘Courses Settings’
– Assign the courses to be available for that membership level. A course can be assigned to different membership levels.
– Also, in Billing Details, Initial Payment is the initial amount of money that user has to pay at registration. For Free plan, you can set the initial payment of $0
There’s a Recurring subscription option that if you check this option, you will open up many more complex pricing options like pay every month, day, etc, or even Trial payment with trial billing amount
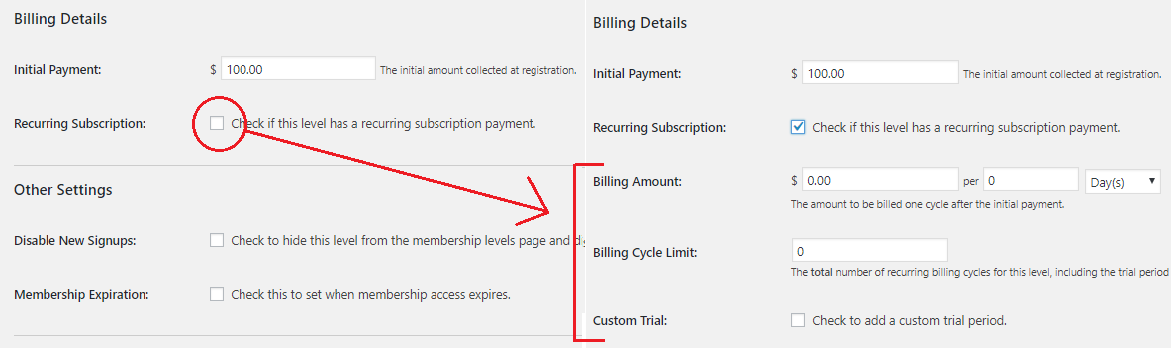
– In other settings, you can also disable new sign ups, or set an expiration date for the membership setting.
It’s pretty flexible.
Since we are setting membership plans for courses, there’s no need to check the categories option. Just Save Level and add another level.
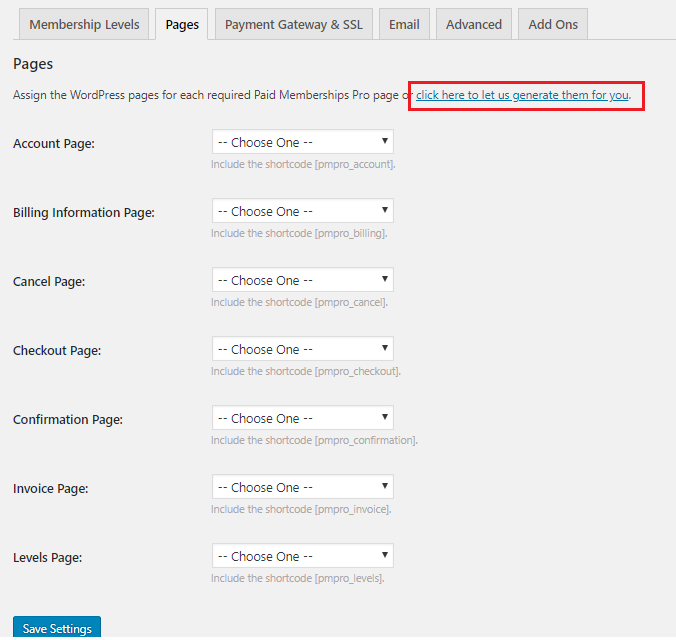
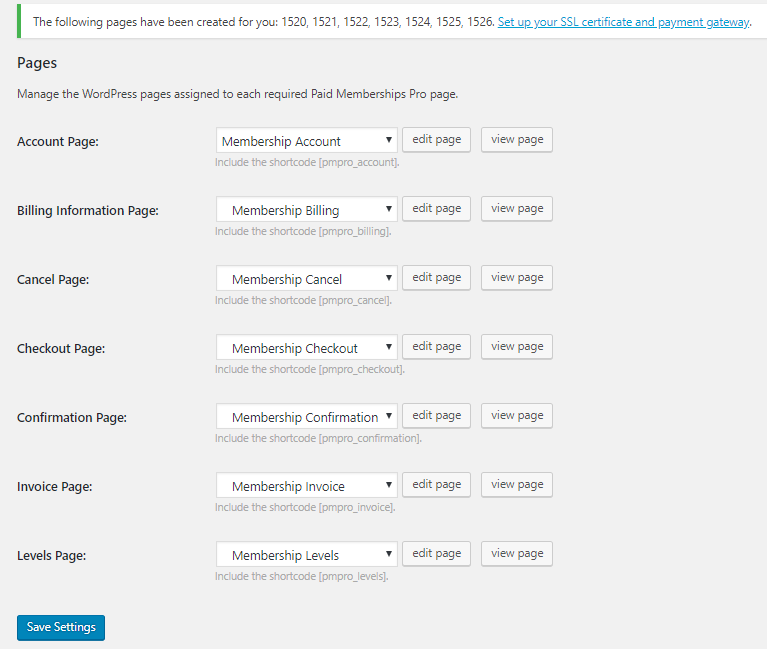
Setup membership pages
– After creating levels, you can see from the membership levels page the list of levels you have made. From there, you can visit ‘Memberships > Page Settings’ or click on ‘Set up the membership pages’ notice. Without setting these pages, the work flow and the function will not work properly.
Normally, you will have to create pages and assign them to the correct title. However, luckily you can just let the plugin do the hard work for you by clicking on “Click here to let us generate them for you“. It will generate all needed pages for membership plans.
The next step is to activate LearnPress Paid Membership Pro add-on.
Normally, if you use our theme, the add-on is already included and setup. If not, you will need to go here to download and install LearnPress Paid Membership Pro. It also goes with the bundle add-on so you can buy our theme and get it from the bundle add-on.
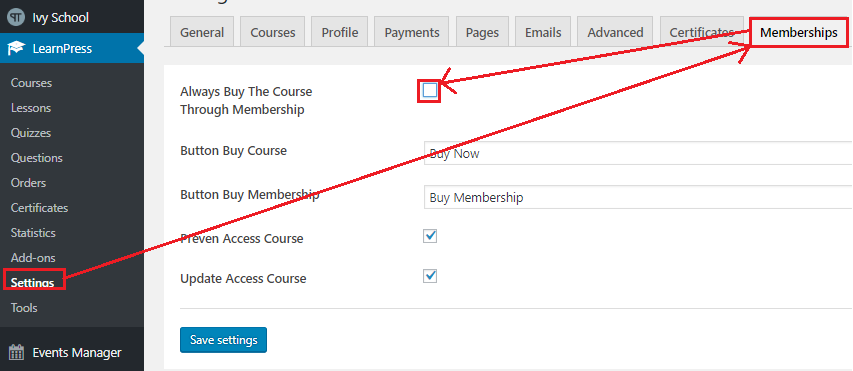
Please go to LearnPress > Settings > Membership.
There will be an option of “Always buy the course through membership”. If you only wish to let all your student access your courses using membership plans, you can uncheck that. If it is checked, the “Button buy course” will disappear and your students only can access course if they have bought a membership plan.
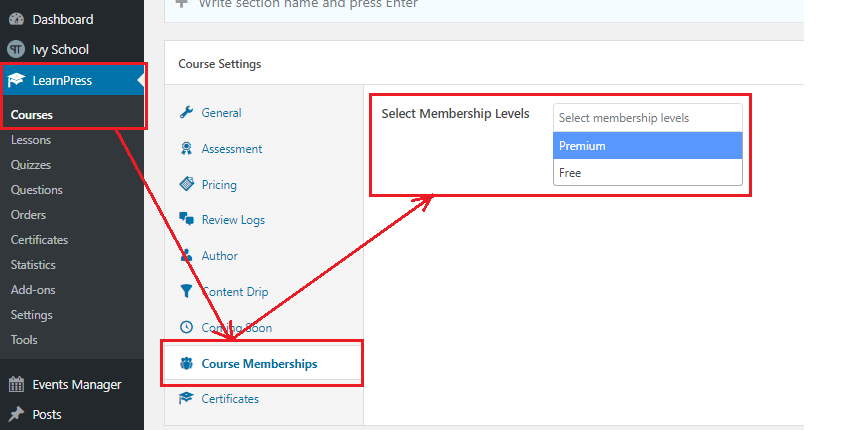
Finally, we will need to assign courses to membership plans: When you go to a course’s setting, reach through Course Memberships tab and select the corresponding membership levels
Here’s how your student will see in real life
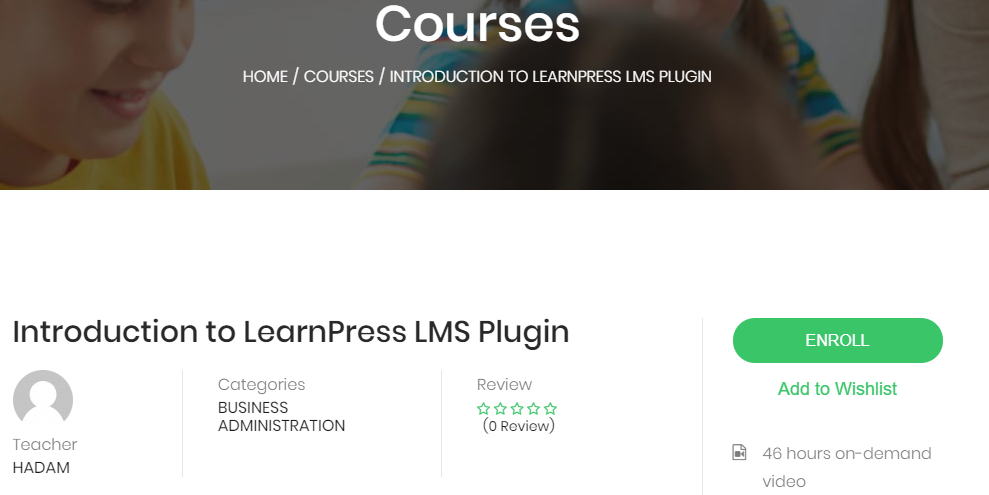
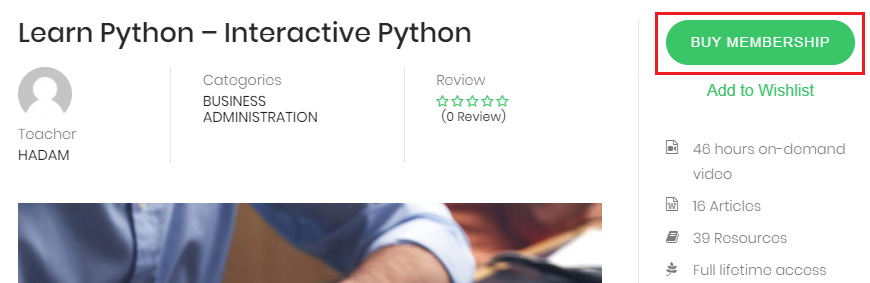
1. Visiting course – Buy Membership Button
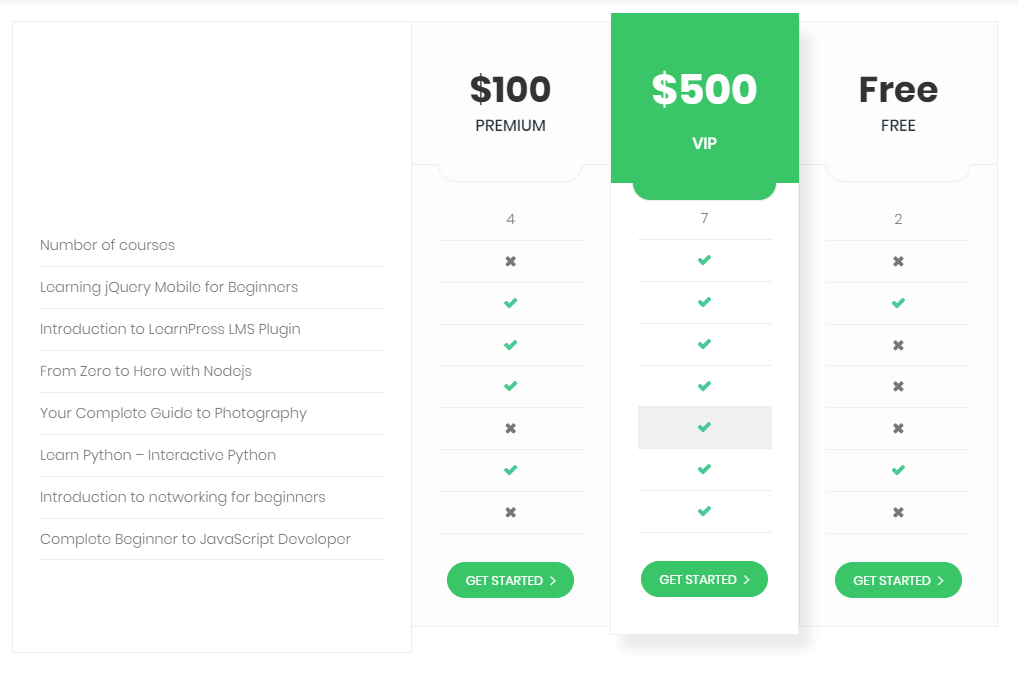
2. Clicking on Buy Membership – Membership plan pages
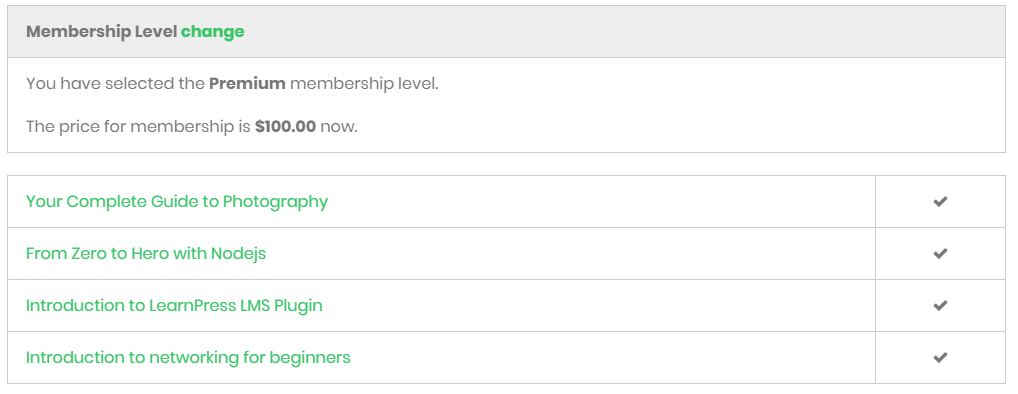
3. Purchase, confirm
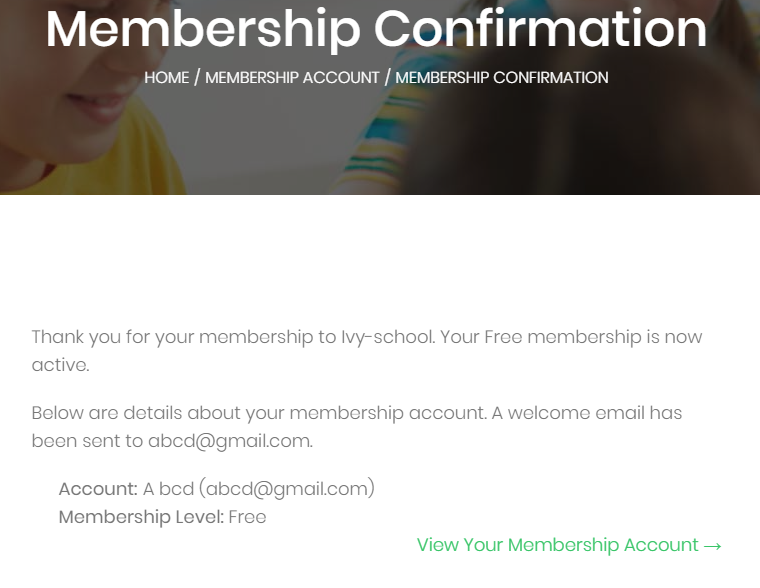
4. Come back to the course – Course is registered and student can access to course’s content